Your first Verdant app
I find Verdant is pretty fun to work with once you get the hang of it, but it's not yet the most approachable framework. Not that it's particularly hard, more that I still haven't cracked how to make it immediately intuitive. So in the meantime, here's a walkthrough of creating a real app that will help show you how to make your own.
What we're building
The app we'll be building is well-tailored for a small, local-first PWA. It's a daily mood tracker, which lets you record how you feel every day and see trends over time. Since it only stores a user's personal data, local-first is a great fit... rather than host everyone's data in one big database we have to pay for, we can make a great app with no server at all.
What we're not building
Briefly, this won't include: any CSS, login, authentication, payments, or a server at all. Perhaps a later tutorial will focus on adding a server for sync and realtime.
Prerequisites
The Verdant app scaffolding has a lot of opinions. Well, they happen to be my opinions, but I know they're not everyone's. Still, they'll be used in this tutorial.
- It uses
pnpm. Runnpm i -g pnpmto install. - The code is all ESM. That means even for TypeScript files, you have to import with
.jsextensions. - The generated project is a monorepo, so you'll want to be familiar with how that works.
Scaffold your app with create @verdant-web/app
You can use the scaffolding CLI to set up your repo.
Run pnpm create @verdant-web/app to run the bootstrapper.
This will get you started with a functional tooling set with a Vite-powered React app and a PWA service worker. It will also create your first Verdant schema.
┌  create-verdant-app
│
◇  Where do you want to create your app?
│  ./mood-tracker
│
◇  What is the name of your app?
│  mood-tracker
│
◇  Copying complete
│
◇  Dependencies installed
│
◇  Client code generated
│
◇  Do you want to open the project in VS Code?
│  Yes
│
└  Done!
Open your new project in an editor, and let's go ahead and create the first iteration of our app's schema.
Writing a schema
Open up ./packages/verdant/src/schema.ts and let's get started!
By default we've got an items collection, an example akin to a to-do list. Let's modify our schema to match up to what our app will do.
Now it's time to get a little creative and start "thinking in local-first." Suppose one day we want to add sync to our app. You could add the entry for May 3 on your phone while offline, then forget and add another entry for May 3 on your laptop. If we don't do this right, even with conflict resolution, you'll end up with 2 entries on May 3 -- and for our purposes, that would be confusing.
So to prevent this happening, it's time to get clever, and make the date our collection's primary key. Let's start from the schema below:
import { schema } from '@verdant-web/store';

const entries = schema.collection({
	name: 'entry',
	primaryKey: 'date',
	fields: {
		date: {
			type: 'string',
			default: () => {
				return new Date().toDateString();
			},
		},
		mood: {
			type: 'string',
		},
	},
});

export default schema({
	version: 1,
	collections: {
		entries,
	},
});
Instead of a randomized ID, we're using the date string of the current day as the primary key. And yes, you can use the default function like that! It will run whenever a new document is created.
So now whenever any device creates an entry on a particular day, they'll all get merged together, because they have the same primary key.
Now that we've got a basic schema ready, we can start using it.
Generating your client
To turn your schema into a full Verdant client, it's time to use the CLI. The scaffolded project we created has the CLI pre-configured to the generate NPM script, so you can just run pnpm generate in the root directory.
The CLI reads your schema, compares it to the current client, and gives you some options. Since this is a new project, we're on schema version 1, and our schema starts out as WIP (work-in-progress).
A WIP schema is a way to play around a bit with the shape of your data before committing to something. Once you bump your WIP schema to a production schema, you can deploy your app, but any further schema changes will need to be a new version with a new migration.
Our version 1 schema has a migration, too, which was generated by the CLI when we set up our project, but we don't really need to worry about it as there's no data to migrate. The version 1 migration is a good place to seed initial data, though.
When we run the CLI this time, let's publish a production schema. Normally you'd probably wait longer and develop your app locally before doing a final production schema, but (spoilers) this tutorial is going to demonstrate schema version migrations a bit, so we'll pretend we're shipping this version of our schema to users.
┌  🌿 Verdant CLI
│
◇  A WIP schema for version 1 is in progress. Choose a way to proceed:
│  📦  Publish the final schema for version 1
│
│  ✨ Applied new schema: version 1
│
└  🌿 Done!
Starting on the app
Now we've got a fully typed client to work with, it's time to start making our app! Let's begin with a component that lets us add a new entry for today.
This code isn't going to be the simplest in the world, but I wanted something that demonstrates some real-world kind of problems you may want to solve. In this case, one problem is that we may not have an entry for today created yet, so we'll need to either create one or update an existing one when the user selects their mood. This means some branched logic, but it's not so bad, and it demonstrates some important ideas for how Verdant hooks work, too.
// apps/web/src/components/entries/EntryCreator.tsx
import { hooks } from '@/store.js';
export function EntryCreator() {
// first we figure out the primary key for today's entry -
// that is, our current date string.
const today = new Date().toDateString();
// now we see if we have an entry already. this hook returns
// either an Entry or null. It will re-render the component if
// the entry is created by us _or_ someone else.
const todayEntry = hooks.useEntry(today);
// this hook gives us a reference to the Verdant client, which
// we can use to create a new Entry if one doesn't exist.
const client = hooks.useClient();
// here's the main logic for "upserting" an entry.
// NOTE: I know that 'bad' doesn't really fit the grammatical pattern of
// this typed mood value, that's on purpose. We'll fix it soon!
const onMoodChange = (mood: 'worst' | 'bad' | 'same' | 'better' | 'best') => {
// if we already have an entry, let's change its 'mood' field
if (todayEntry) {
// there is no need to 'await' here. all changes to existing documents
// in Verdant are synchronous
todayEntry.set('mood', mood);
} else {
// if we don't have an entry, we can 'put' a new one with today's
// date
client.entries.put({
date: today,
mood,
});
}
};
// this hook re-renders the component whenever the immediate fields
// of the Entry change. If `todayEntry` doesn't exist, it doesn't do
// anything. It also doesn't re-render for nested changes, unless
// you pass a config object as the second param.
hooks.useWatch(todayEntry);
// now we can get the current mood value for today's entry, if
// it exists.
const currentMood = todayEntry?.get('mood');
return (
<div>
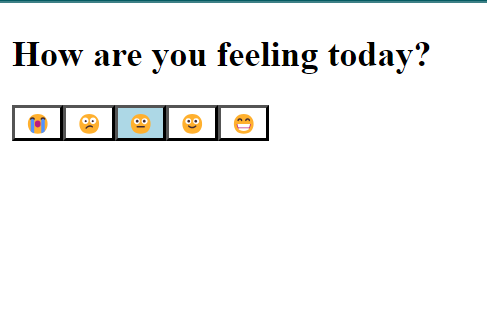
<h2>How are you feeling today?</h2>
{/* Our buttons for mood entry will go here */}
</div>
);
}
For the actual mood entry buttons, there's nothing really Verdant-specific. I'm being really naive with this code, you'd probably want to create a reusable component or something, but this is functional.
{
	/* Put this where the other comment was */
}
<div style={{ display: 'flex', flexDirection: 'row' }}>
	<button
		style={{
			background: currentMood === 'worst' ? 'lightblue' : 'white',
		}}
		onClick={() => onMoodChange('worst')}
	>
		😭
	</button>
	<button
		style={{ background: currentMood === 'bad' ? 'lightblue' : 'white' }}
		onClick={() => onMoodChange('bad')}
	>
		😕
	</button>
	<button
		style={{ background: currentMood === 'same' ? 'lightblue' : 'white' }}
		onClick={() => onMoodChange('same')}
	>
		😐
	</button>
	<button
		style={{
			background: currentMood === 'better' ? 'lightblue' : 'white',
		}}
		onClick={() => onMoodChange('better')}
	>
		🙂
	</button>
	<button
		style={{ background: currentMood === 'best' ? 'lightblue' : 'white' }}
		onClick={() => onMoodChange('best')}
	>
		😁
	</button>
</div>;
Let's drop this component on our apps/web/src/pages/HomePage.tsx and delete the old TodoList stuff while we're at it.
import { EntryCreator } from '@/components/entries/EntryCreator.jsx';

export interface HomePageProps {}

export function HomePage({}: HomePageProps) {
	return (
		<div>
			<EntryCreator />
		</div>
	);
}

export default HomePage;
Test it out!
Like that, we've already covered the core functionality of the app: creating daily entries and selecting a mood. That's genuinely it. You could build and ship this and it will work local-first and offline.
Time to try that for ourselves: run pnpm dev.
At localhost:3000, you'll see your app! Click on an option and it will stay selected even if you reload the page. If you feel like it, set this tutorial aside and come back tomorrow and it should be back to no selection.
Time for a schema revision!
That's a good starting point, but our app could do more. What if we show previous entries on the home screen? Also, while a plain string works ok for mood, it would be preferable to have a proper typed value so we could be sure our data was consistent.
Let's take another pass at our schema. Reopen schema.ts and make some changes:
import { collection, schema } from '@verdant-web/store';

const entries = collection({
	name: 'entry',
	primaryKey: 'date',
	fields: {
		date: {
			type: 'string',
			default: () => {
				return new Date().toDateString();
			},
		},
		mood: {
			type: 'string',
			// NEW!
			options: ['worst', 'worse', 'same', 'better', 'best'],
		},
	},
	// NEW!
	indexes: {
		date: {
			field: 'date',
		},
	},
});

export default schema({
	version: 1,
	collections: {
		entries,
	},
});
What did we change? We specified some concrete options for the mood field (also notice how I've replaced bad with worse here). We also added indexes to the document -- one for the date field. This index will let us query on date to show recent entries.
Now we can run pnpm generate again to make a new version of our schema. Let's make it another WIP version so we can test that our changes work in our app for what we want to build.
Note that you don't bump your schema to
version: 2by hand. The CLI will do this for you.
┌  🌿 Verdant CLI
│
◇  Schema version 1 already exists and yours is different. Choose a way to proceed:
│  🏗️  Start a new WIP schema for version 2
│
│  ⬆️  Bumped schema version to 2
│
│  ✨ Applied new WIP schema: version 2
│
◇  A new migration was created for your schema changes. Open it in VS Code now?
│  Yes
│
└  🌿 Done!
Let's also go ahead and open up our migration file at packages/verdant/src/migrations/v2.ts. We have some work to do here.
Writing our first migration
So as I've pointed out a few times now, I started this code using bad as the second mood option, but in this new schema revision I've codified the second option should instead be worse.
Imagine if a user had been using our app and put in bad for some of their entries already. This isn't just a thought exercise, you must learn to imagine scenarios like this when building local-first apps and changing your schema. If you don't properly take these changes into account, even with the protections I've tried to include in Verdant, you could end up with inconsistent data!
So we need to write a migration which makes sure every Entry has a valid value for mood according to our new schema. We can do this fairly simply with the migration scaffolding already provided by the CLI.
First, let's try just passing through the existing entry and see what happens...
import v1Schema, {
	MigrationTypes as V1Types,
} from '../client/schemaVersions/v1.js';
import v2Schema, {
	MigrationTypes as V2Types,
} from '../client/schemaVersions/v2.js';
import { createMigration } from '@verdant-web/store';

export default createMigration<V1Types, V2Types>(
	v1Schema,
	v2Schema,
	async ({ migrate }) => {
		await migrate('entries', async (old) => ({
			...old,
		}));
	},
);
If you put this code in your editor, you'll see a Typescript error! Verdant has created typings for both the v1 schema and v2 schema, and it knows that mood was previously a string, but is now a union type 'worst' | 'worse' | 'same' | 'better' | 'best'. Typescript will not let us pass the old mood off as the new one.
So let's fix it! We can pick out the mood field and write some logic to make sure it's within the bounds of the new field.
import v1Schema, {
	MigrationTypes as V1Types,
} from '../client/schemaVersions/v1.js';
import v2Schema, {
	MigrationTypes as V2Types,
} from '../client/schemaVersions/v2.js';
import { createMigration } from '@verdant-web/store';

export default createMigration<V1Types, V2Types>(
	v1Schema,
	v2Schema,
	async ({ migrate }) => {
		await migrate('entries', async ({ mood, ...old }) => {
			if (mood === 'bad') {
				// convert "bad" to "worse" according to our new field options
				return {
					...old,
					mood: 'worse',
				};
			} else if (
				// you might find this verbose, but simple, readable, and
				// typesafe without casting is a good way to go for such
				// crucial code as migrations.
				mood === 'worst' ||
				mood === 'worse' ||
				mood === 'same' ||
				mood === 'better' ||
				mood === 'best'
			) {
				return {
					...old,
					mood,
				};
			} else {
				return {
					...old,
					// we need to supply *some* default...
					mood: 'same',
				};
			}
		});
	},
);
Now we have our first migration! But we're not done with making changes for our new schema yet. Verdant's CLI has generated new typings for our Entry model, and now some of our code is also setting off Typescript errors.
Let's head back to apps/web/src/components/entries/EntryCreator.tsx. We've got a few errors here, all related to mood. Now's a good time to leverage the fancy types Verdant created for us. Starting with onMoodChange, we can import the EntryMood type, which gives us all valid options for the mood field!
const onMoodChange = (mood: EntryMood) => {
	if (todayEntry) {
		todayEntry.set('mood', mood);
	} else {
		client.entries.put({
			date: today,
			mood,
		});
	}
};
Now instead of a hand-written, hand-maintained union string type, we know this corresponds with what our model expects. Likewise, Typescript will stop complaining about this function. But we still have to track down other problems: all the uses of bad in our code! Since bad is no longer the proper value, Verdant's typings have singled it out for fixing. Replace the red-squigglied bad strings with worse, and now Typescript is happy.
It's not just making Typescript happy... not just an exercise in Correct Typing for its own sake. This is Verdant pointing out problems with how we're using our documents. These errors aren't superficial; they're mistakes that would cause data inconsistency if left unchecked (don't worry, even if the typings don't alert you, Verdant still checks these kinds of things at runtime, but it's far better to fail early).
Ok, now we've fixed the errors. We can test our migration was successful by running our app! Well, you shouldn't see anything particularly strange going on. Our data has been migrated, and the app keeps working. Just like we want!
Querying older entries
So far we've done one query - for today's entry. But Verdant can do more complex queries than looking up a document by its primary key. We created an index on date in our new schema, so now let's query the last 5 items and show them on the homescreen.
Here's a component that could do that:
import { hooks } from '@/store.js';

export function RecentEntries() {
	const [entries] = hooks.useAllEntriesInfinite({
		key: 'recentEntries',
		pageSize: 5,
		index: {
			where: 'date',
			order: 'desc',
		},
	});

	return (
		<ul>
			{entries.map((entry) => (
				<li key={entry.get('date')}>
					{entry.get('date')} - {entry.get('mood')}
				</li>
			))}
		</ul>
	);
}
I've gone ahead and set up an "infinite" paginated query. I imagine in a real app we'd want to continue to load more results as the user scrolls. Right now it just fetches the latest 5.
But wait! If you're used to working with dates in Javascript, you may realize something about our date field and how it's ordered. If you're not, here's some examples of what those dates might look like:
Nov 23 2023May 3 1992Jan 1 2000
Those won't sort like we want! Oh dear!
Here's the thing about primary keys... you can't really change them easily. We could rewrite all the entries, basically moving them from one place to another (you can actually do this in a migration if you want). But this can disrupt conflict resolution, because the new documents get new identities.
Side note: I chose a rather poor (but still unique and predictable) primary key to represent a date for this tutorial. When you're building your apps, try to take more care designing your primary key to avoid this kind of situation entirely! In most cases, though, a random ID is sufficient, so this kind of problem is less likely to affect you.
The truth is, when you're working in local-first systems, you're likely to make mistakes like this at some point. Verdant tries to give you some tools to recover from them. In this case, while we can't rewrite our date fields, we can change the index we're querying on to fix the data and make it well-ordered.
Let's change our date index from
  indexes: {
    date: {
      field: 'date',
    },
  },
to
  indexes: {
    date: {
      type: 'number',
      compute: (entry) => new Date(entry.date).getTime(),
    },
  },
Now we're processing our English formatted Date back into an orderable Unix timestamp. Our new index will work fine with a simple query ordering!
Run pnpm generate again and make a new WIP schema version to apply our changes.
Side note: WIP schemas don't run against your 'real' data. They create a new copy of that data in a temporary IndexedDB database so you can fool around a bit without ruining your dev environment. Doing another WIP revision creates a new copy of the database (from the original 'main' copy).
Cool, now our entries can be queried in order. Let's add the RecentEntries component to our home page, too.
import { EntryCreator } from '@/components/entries/EntryCreator.jsx';
import { RecentEntries } from '@/components/entries/RecentEntries.jsx';

export interface HomePageProps {}

export function HomePage({}: HomePageProps) {
	return (
		<div>
			<EntryCreator />
			<RecentEntries />
		</div>
	);
}

export default HomePage;
And now we've got our recent entires. If you're doing this tutorial in one day, this will only show today's, of course.
Reactive updates
Play around a bit, try changing the mood for today. You'll probably notice that there's a small delay, and then the recent entry changes, too. We'll get to that delay in a moment. But the point I want to make here is that you don't have to do anything particular to wire your changes from one query into a different one. No optimistic updates or cache invalidation. Verdant keeps track of this for you.
Now, here's a secret: the Entry powering the selector and the Entry being displayed in the list are exactly the same object in memory. Every "entity" in Verdant is cached by identity and only ever shows up once.
So why the delay? Well, while the data of that Entry might change immediately (literally, synchronously!), the component that's rendering it in RecentEntries isn't reactive to that change - it's not using hooks.useWatch! So it doesn't update until the slower reactivity trigger of refreshing the useAllEntriesInfinite query, which has to round-trip to IndexedDB.
We can actually make this faster, by refactoring a bit to have the recent entries watch their respective documents for changes.
import { hooks } from '@/store.js';
import { Entry } from '@mood-tracker/verdant';

export function RecentEntries() {
	const [entries] = hooks.useAllEntriesInfinite({
		key: 'recentEntries',
		pageSize: 5,
		index: {
			where: 'date',
			order: 'desc',
		},
	});

	return (
		<ul>
			{entries.map((entry) => (
				<RecentEntry entry={entry} key={entry.get('date')} />
			))}
		</ul>
	);
}

function RecentEntry({ entry }: { entry: Entry }) {
	const { date, mood } = hooks.useWatch(entry);
	return (
		<li>
			{date} - {mood}
		</li>
	);
}
This also gives me a chance to demonstrate two more Verdant goodies.
One, the named type generated for Entry. Just like EntryMood, it's a convenient way to refer to your data types. Verdant generates named types for every document, field, and subfield!
Two, the version of useWatch when you pass something that isn't | null lets you destructure fields directly, rather than having to call .get on the entity itself. It's a little convenience helper that makes React code slightly cleaner.
Finally, if we try out our app again, that pesky delay is gone.

Clicking on a mood now updates and re-renders all components that display that entry everywhere in the app, immediately, without needing to wait for data to reach IndexedDB or be queried again.
Building for deployment
Great, now we've got some basic functionality! Let's build our app for deployment to a static site.
Run pnpm build and...
Oops!
@mood-tracker/verdant:build: > verdant preflight -s ./src/schema.ts -o ./src/client
@mood-tracker/verdant:build:
@mood-tracker/verdant:build: Canonical schema is WIP. Run the CLI to upgrade to a production schema before deploying.
@mood-tracker/verdant:build:  ELIFECYCLE  Command failed with exit code 1.
@mood-tracker/verdant:build:  ELIFECYCLE  Command failed with exit code 1.
The starter kit is configured to run verdant preflight before a production build. This CLI command checks over your code to be sure it's really ready to deploy to users.
Using the
pnpm preflightcommand can be helpful for making deployments safe, and in case it isn't clear, deploying new code can be much riskier in local-first apps than in cloud apps. One bad move could delete users' data with no recovery options. So if you're planning on shipping your app, you'll want to incorporate this preflight command in your CI. The starter kit places it in the build step, but you could move it to a separate job, just as long as it gates a deployment.
We're still on a WIP schema! We don't want to ship this to production. First, we need to upgrade our schema to a production schema. This is easy, with pnpm generate which runs the Verdant CLI.
┌  🌿 Verdant CLI
│
◇  A WIP schema for version 2 is in progress. Choose a way to proceed:
│  📦  Publish the final schema for version 2
│
│  ✨ Applied new schema: version 2
│
└  🌿 Done!
Now our schema is ready for deployment, and our pnpm build command succeeds.
The resulting output in apps/web/dist is ready to be uploaded to any static website host, or you may want to set up your repo with automatic deployment via a provider like Vercel or Netlify.
I want to point out...
We made a fully functional app, which provides some value to the user, persistently stores data on-device, and reactively updates the UI for every change. And we did it without:
- A React state library like Redux or Zustand
- A React query and cache library like React Query or RTK Query
- Worrying about cache invalidation, async mutations, or optimistic updates
The cool thing is no matter how complex your app gets or how big it grows, Verdant continues to work without these things really well. You might find yourself reaching for other tools sometimes, but it will be for more localized problems (like temporary session state) and not holistic ones. Verdant can power ambitious apps, like my cooking app Gnocchi, out of the box.
I hope this tutorial made you more excited for local-first development and how simple it can be, and perhaps also for Verdant in particular.
More things to explore
Your app comes pre-configured with a PWA-ready service worker and web manifest, but you'll want to customize these details with your own app information, of course.
There's also plenty more to explore in Verdant, including more advanced indexing, and of course setting up a server for sync.
But I hope this short tutorial gives you a microcosm of what it means to make a local-first / local-only app in Verdant, including some challenges and how to approach them.
Happy coding!